Everyone has a passion, something they enjoy sharing with others; Photography, videography, travel, fitness surfing. A blog is a great way to share your knowledge with others and build a community around it. It’s easy, in 5 steps I’ll show you how to start a blog.
You don’t need to be a pro or
Self Host Your Blog
In 5 steps I’ll show you how to start a blog… Don’t be scared, I’ll walk you through each step.
Building your blog on a self-hosted website is the best option, such as wordpress.org (not to be confused with wordpress.com) – wordpress.com is a hosted option but offers less options as you grow and scale your business.
WordPress.org is what most serious bloggers use, and what I choose to build Just In time on.
Disclaimer: This post contains affiliate links, I’ll get a small commission (at no extra cost to you) if you make a purchase through a link based on my recommendation. This helps keep this website free so I can create more content for you. Thank you in advance for your support!
5 Steps To Start A Blog
- Decide on your niche (what is your website about?)
- Set up your hosting service
- Decide on your domain name (What you type in to go to the website, ex. Justintime4.com)
- Installing wordpress
- Build it out (Make it yours!)
Ready to begin? Lets go!
Step #1: Your Niche
Deciding on your niche is important because it’s the whole theme of your blog. This is where your passion comes out. My niche is travel with student loans. Obviously the travel niche is popular, so I’m focusing on graduates with student loans as my target audience.
Your niche should:
- Be something you are passionate about! If you aren’t excited about, how do you think it will come across to your readers?
- Create open discussion, you want a conversation with your readers.
- Be something you can grow into as an authority: Don’t worry if other people are covering the same topic. Find a unique angle, remember YOUR point of view hasn’t been heard yet.
Now that you have it narrowed down it’s time to move to host your site.
MONEY SAVER: Sign up for a FREE Rakuten account to save $10 off your Bluehost purchase. Complete walkthrough found HERE.
Step #2: Hosting with Bluehost
Click HERE to begin setting up your Bluehost account.
(Don’t worry if the pages are slightly different, Bluehost is always altering and updating their site. You might be lucky enough to catch them on a sale too!)
It will lead you to this page ↓
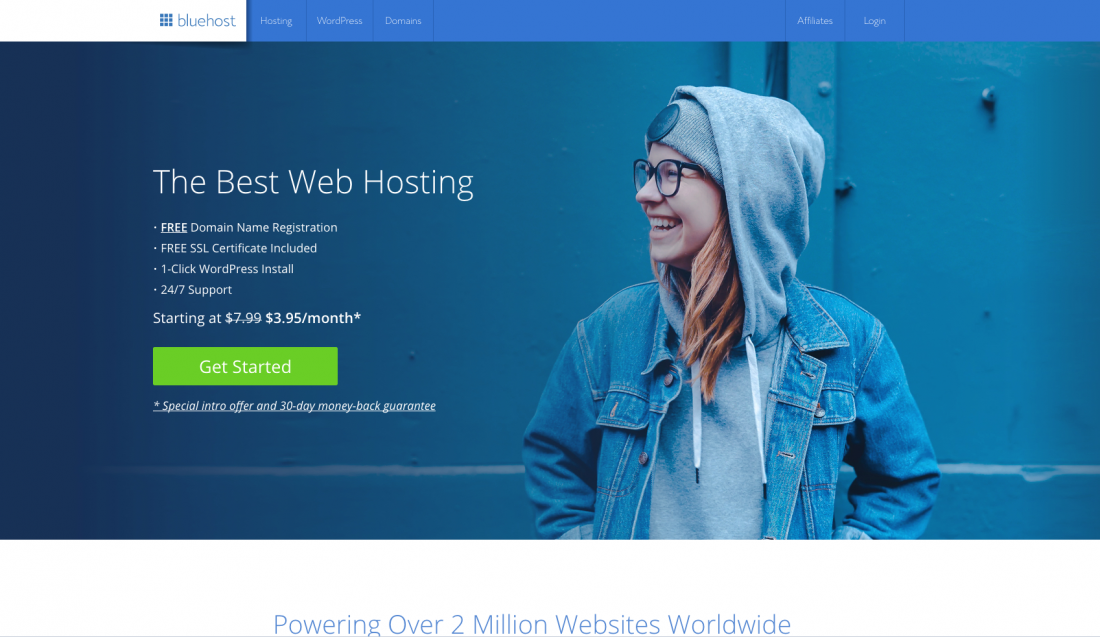
Click “Get Started Now”.
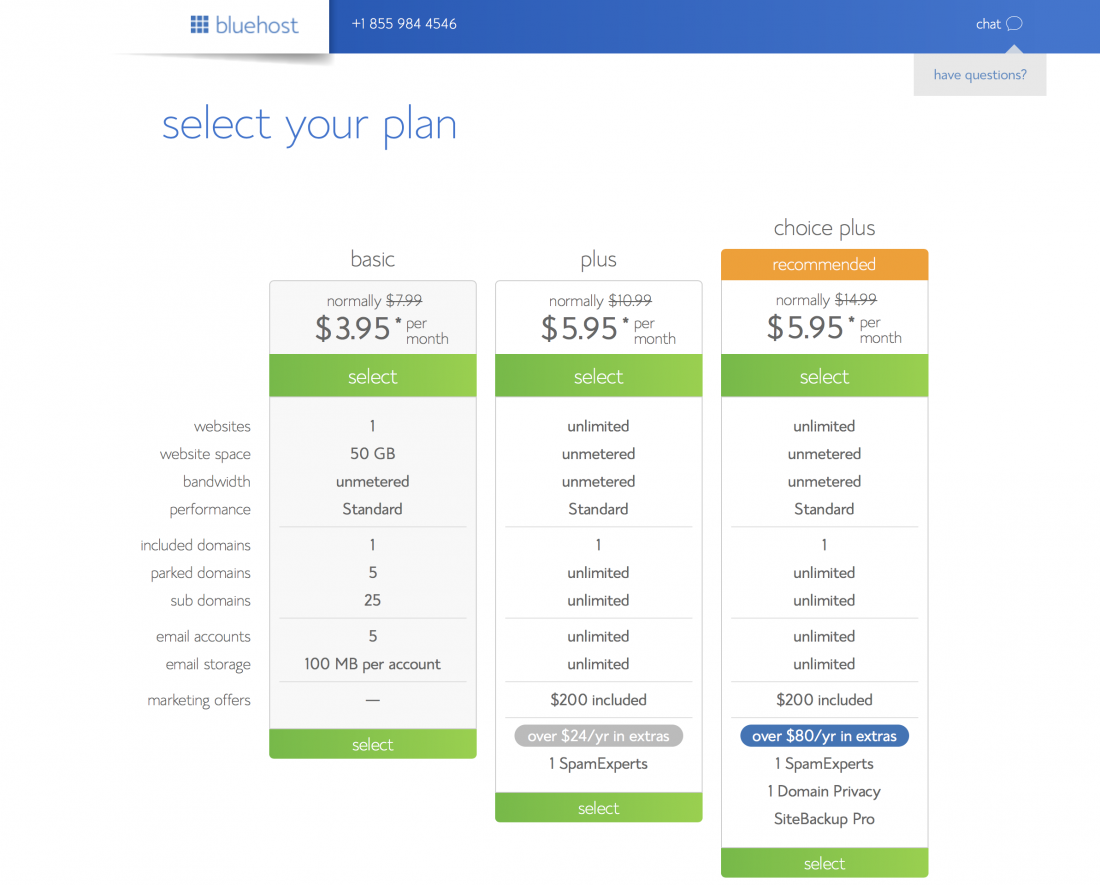
Next step is selecting your plan. I stuck with the “Basic” because I am only running one website and was on a tighter budget.
Plus or Prime does have more benefits such as domain privacy and unlimited storage.
Choose what best suits your needs. You can always upgrade later. ↓
Step #3: Domain name
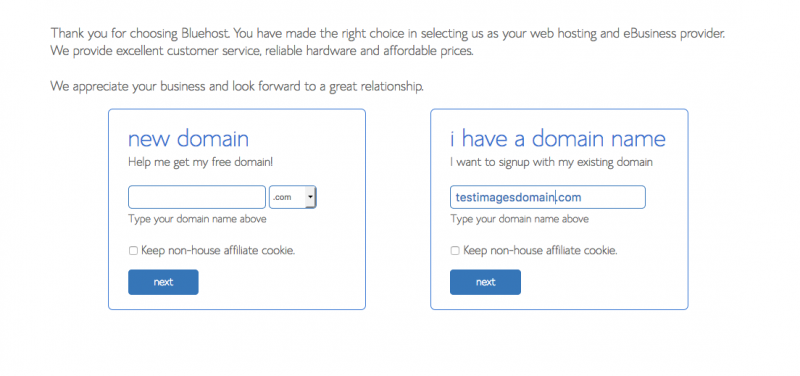
Your domain name is how people find your page, such as Justintime4.com. This will be the gathering site of your business so make sure it’s short and memorable. Bluehosts basic plan provides you with 1 free domain name.
Enter your domain info here and choose .com, .org, etc. ↓
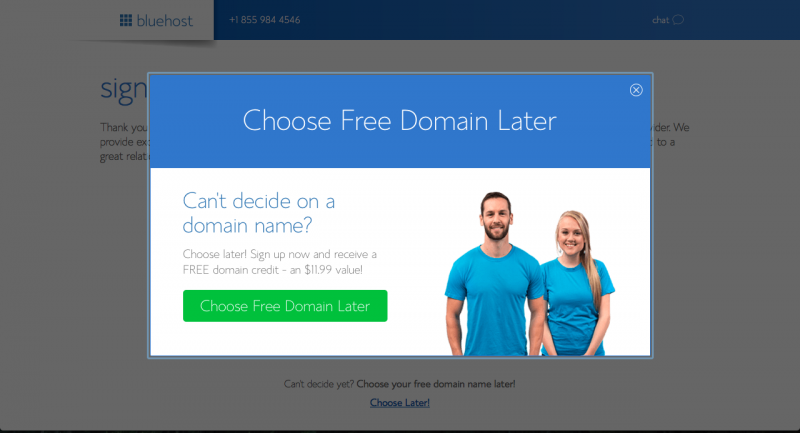
Don’t worry if you can’t figure it out just yet, just click the option to choose a domain name later (bottom of the page). It will look like this. ↓
Step 4: Account Set Up
If you have chosen the “basic” plan as I did, you have the option to add domain privacy protection. I highly recommend it as it will protect your site from spammers and hackers.
Fill in your account info and payment information ↓
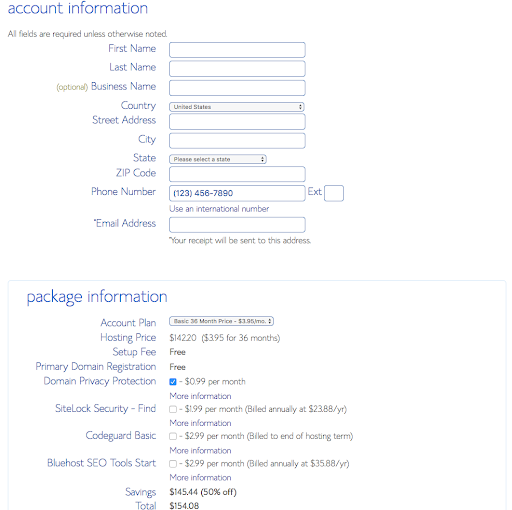
Bluehost offers a monthly rate but collects payment as a whole. I opted for the 3 year service so I was covered for the near future.
Enter your payment info, agree to terms and click “submit” ↓
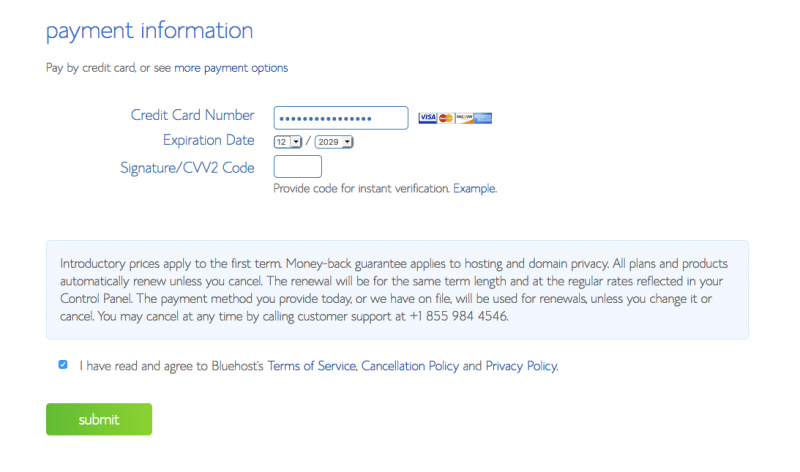
Once your click submit you’ll be offered upgrades and special offers, I skipped them by clicking “no thanks”.
Now it’s time to create your password, make it memorable! ↓
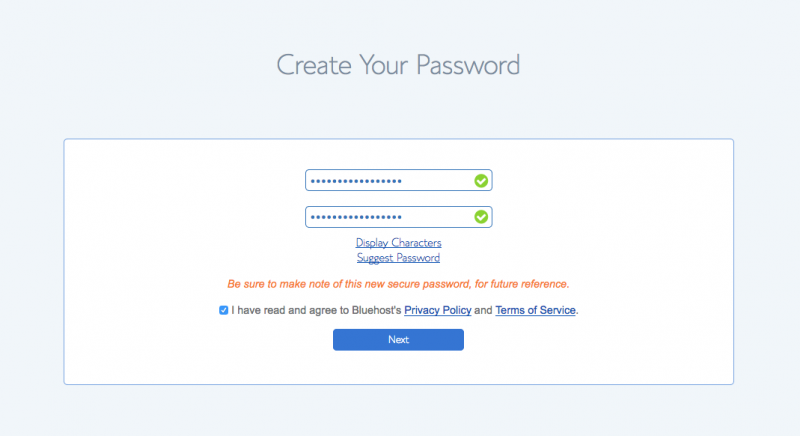
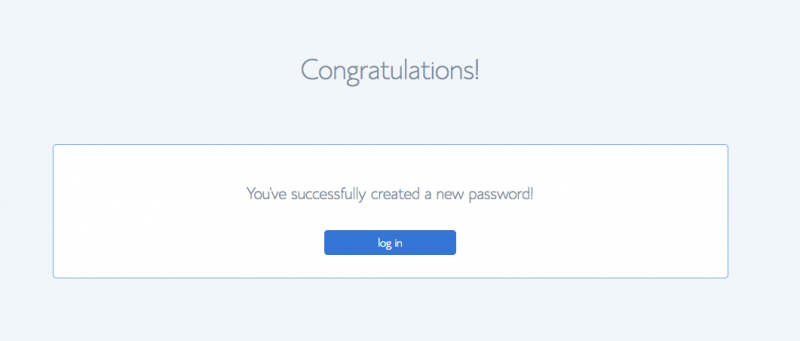
Now for the fun part, click “log in” ↓
Bluehost makes it super easy for you to build out your site. Pick a theme! Themes are the clothes of your site, it’s how they look on the outside.
You can change or upgrade to a premium theme at any time.
Tip: Don’t get hung up finding the perfect theme right away. Building your site is 100% more important than your theme.
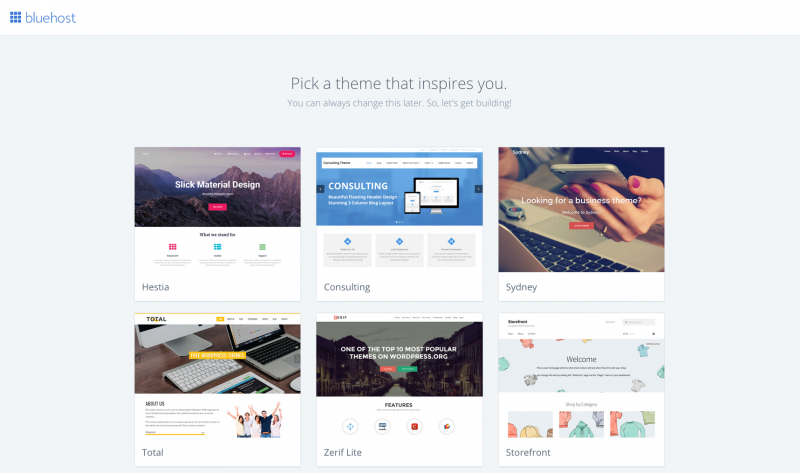
All done! Now you are ready to see the wordpress dashboard and start building out your website!

Step #5: WordPress
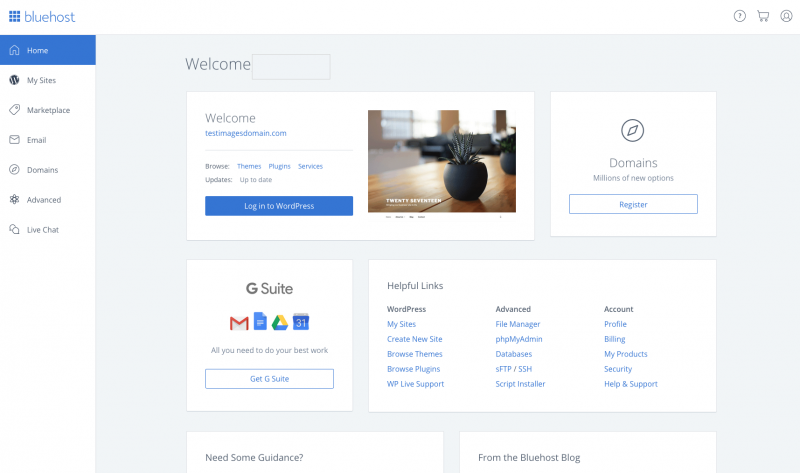
Welcome to your dash board! You will become very familiar with this view. You will build out your site and enter content here.
First things first – lets activate your site, click “Bluehost” in the upper left corner ↓
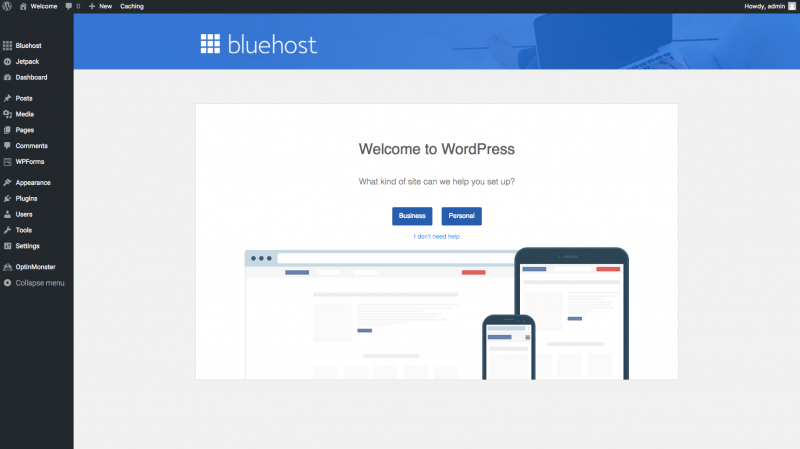
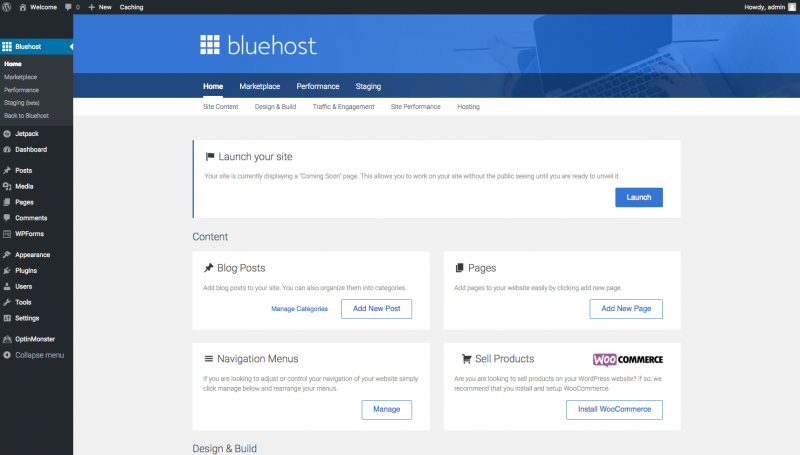
Time to take it live! Click the blue “Launch” button ↓
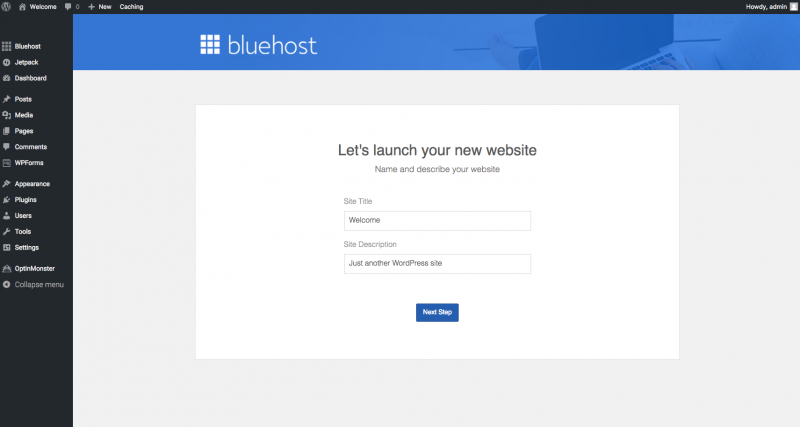
Almost there! Give your site a name and a site description.
You can update them in your setting at any time.
Time to secure your site. Bluehost offers a FREE SSL certificate. What this means is it adds a “s” to the http:// at the beginning of your website letting the visitors know your site is safe and secure to visit.
Here are the steps to installing your FREE SSL certificate.
Give yourself a pat on the back, or a beer… you deserve it.
Build it out
You made it, your website is functional and you are ready to build it out!
One of the first things I would do is install some essential plugins to ensure your site runs smoothly.
Plugins either provide a service (security, design, etc) to your website or allow easy customization without the need to know coding (HTML, CSS).
Here are the ones I have found that helped my site the most!
Plugins
- Akismet Anti-Spam: Protect your blog from spam – Trust me you’ll need it!
- Custom Facebook Feed: Add customizable Facebook feeds to your blog, perfect if you have fan page. It allows readers to like and interact with your Facebook page while on your blog.
- Dynamic Widgets: Choose when and where your widgets appear.
- Easy Google Fonts: Control to change fonts, sizes and spacing without coding.
- Google Analytics Dashboard for WP: Keep track of site visitors from your dashboard. Track where they come from, how long they stay, etc.
- Hide Featured Image: It hides the featured image from the top of your blog post (not a necessity but I found it very useful).
- Instagram Feed: Create a custom instagram feed as a widget for your readers to interact with.
- Jetpack by WordPress:
- Page Scroll to ID: Set buttons to animated scroll to a different point of the page.
- Post Thumbnail Editor: Edit, resize and crop images for image thumbnails.
- Social Media and Share Icons (Ultimate Social Media): Add social media icons to your website.
- WordPress Popular Posts: Customizable widget that shows all of your most popular posts.
- WP Canvas – Widgets: Add more widgets to your site, like an “about me” widget.
- WPForms Lite: Contact forms mad easy.
- Yoast SEO: All in one SEO for your site. Helps maximize your sites rankings in google to get you more views.
Congratulations! You have officially launched your blog! This is only the beginning of your journey, stay eager and willing to learn!
When I built my brand I did it with the Wired Creatives Get Wired course. Check out my Wired Creatives Review to see if it could help you with the next steps in your journey!
If you have any questions or concerns, please comment below. I’ll do my best to answer as quickly as possible.


Leave a reply